Advanced Vertex Painting
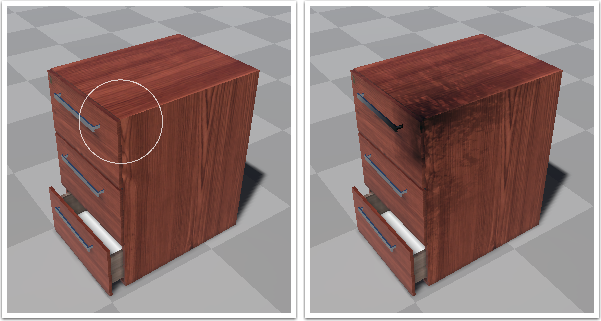
If we paint on the corner here, we end up changing the vertex colors on each side of the drawers.
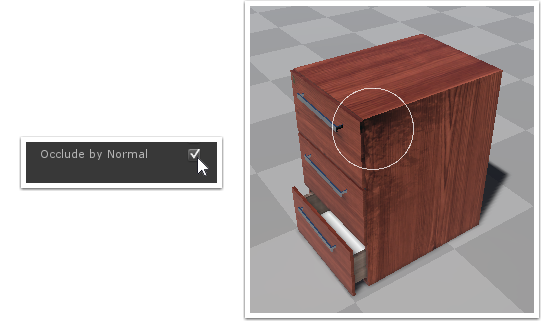
When "Occlude by Normal" is checked, the brush will remember the surface normal at the point which the mouse is pressed. A falloff is applied to vertices whos normals face away from that surface normal, allowing you to restrict painting to one side of a shape.
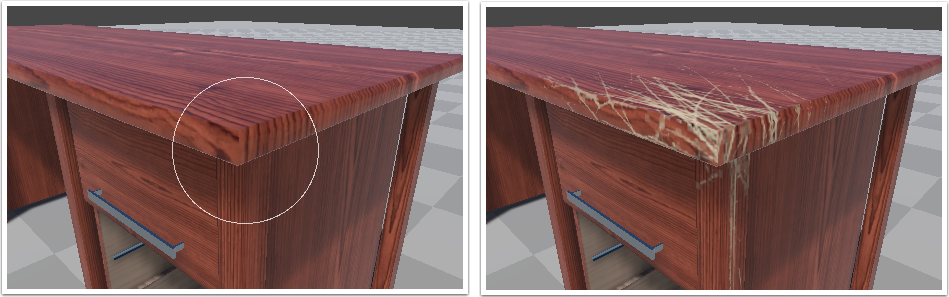
You can also restrict vertex painting to the vertices that aren't occluded. In this example, the vertices of the top of the table leg have recieved paint because of their proximity to the table-top corner.
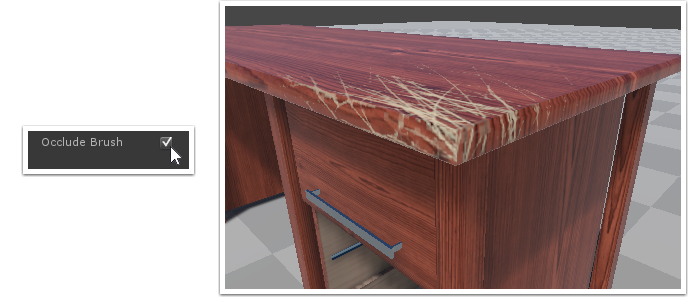
With "Occlude Brush" checked the hidden vertices aren't affected while painting.
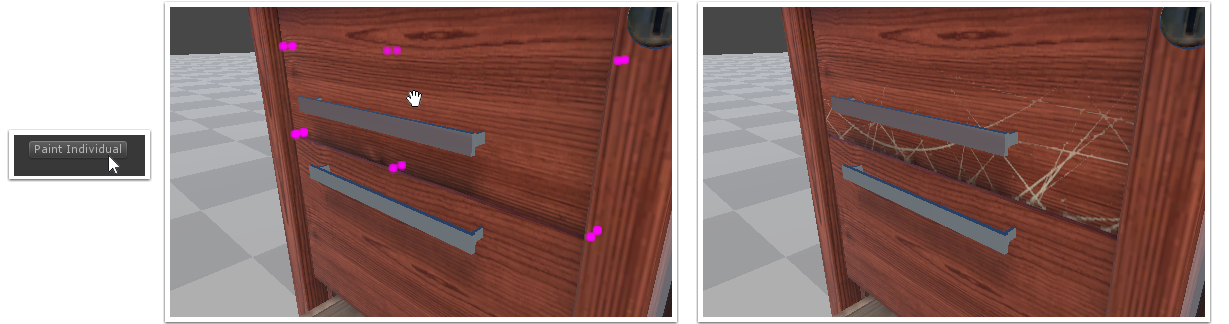
Another useful feature is the "Paint Individual" option. By clicking the button (or holding shift), then clicking an individual sub-mesh of you meshgroup, painting is restricted to that mesh only. In this example the top drawer was selected, so painting is disabled on all other meshes (notably the lower drawer).
Click the "Paint Whole" button (or press Esc) to exit individual-painting mode.
The most useful tool for understanding and debugging the vertex-painting process, is the Wireframe mode. This not only shows you the model's wireframe, but also hilights the individual vertices and the influence of color (or dirt) changes.
